
Imagine this scenario: you’re driving down the road, and suddenly you notice the car behind you flashing their headlights frantically.
Confused, you look in your rearview mirror and realize that your brake light is out. It’s a common issue that many drivers face at some point, but fear not!
In this comprehensive guide, we will walk you through the process of changing your brake light, empowering you to take matters into your own hands and save some bucks in the process.
Table of Contents
ToggleWhy Should You Replace a Brake Light Yourself?
Before we dive into the nitty-gritty of brake light replacement, you might be wondering why you should bother doing it yourself when you can simply take your car to a mechanic. Well, let’s consider a few reasons:
- Cost-saving: Paying a mechanic to replace a brake light can be surprisingly expensive. By doing it yourself, you can save a significant amount of money that can be put towards other important things in life.
- Convenience: DIY brake light replacement allows you to take control of your car maintenance schedule. No need to rush to the mechanic or wait for an appointment. You can tackle the task at your own pace, in the comfort of your own garage.
- Empowerment: Being able to perform basic car maintenance tasks on your own gives you a sense of accomplishment and empowerment. It helps you understand your vehicle better and builds your confidence as a car owner.
Now that we’ve established the benefits of DIY brake light replacement, let’s dive into the step-by-step process.
Step 1: Gather the Necessary Tools and Materials
To get started, you’ll need the following tools and materials:
- A new brake light bulb (check your vehicle’s manual or consult an auto parts store to find the correct bulb for your make and model)
- A screwdriver (usually Phillips or flathead, depending on your car)
- Latex gloves (to avoid getting oils from your fingers on the new bulb)
- A clean cloth or paper towel (to handle the bulb and keep it clean)
- Optional: a small container or bag (to keep any loose screws or small parts together)
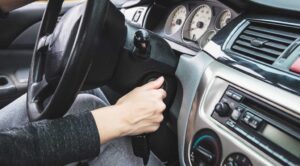
Step 2: Locate and Access the Brake Light Assembly
Each vehicle model is slightly different, so consult your car’s manual for specific instructions on how to access the brake light assembly. In general, you will need to:
- Open the trunk or rear hatch of your vehicle.
- Remove any carpeting or trim that may be covering the brake light assembly.
- Locate the housing that holds the brake light bulb.
Step 3: Remove the Old Brake Light Bulb
Once you have access to the brake light assembly, follow these steps to remove the old bulb:
- Identify the socket that holds the bulb.
- Carefully twist the socket counterclockwise to unlock it.
- Gently pull the socket out of the assembly.
- Remove the old bulb from the socket by pulling it straight out.
Step 4: Install the New Brake Light Bulb
Now it’s time to install the new brake light bulb:
- Take the new bulb and avoid touching the glass part with your bare hands. Use a clean cloth or paper towel to handle it.
- Insert the new bulb into the socket, pushing it in until it is securely in place.
- Insert the socket back into the brake light assembly and twist it clockwise to lock it in position.
- Test the new bulb by turning on your car’s headlights and pressing the brake pedal. Make sure it lights up properly.
Step 5: Reassemble and Test
After successfully replacing the brake light bulb, follow these steps to reassemble everything:
- Replace any carpeting or trim that you removed earlier to access the brake light assembly.
- Close the trunk or rear hatch of your vehicle.
- Test the brake light again by pressing the brake pedal and observing if it lights up.
Conclusion
Congratulations! You’ve successfully replaced your brake light bulb, saving yourself time and money in the process. By following this DIY guide, you have taken control of your car’s maintenance and empowered yourself as a vehicle owner. Remember, regular maintenance is key to keeping your vehicle in optimal condition, and simple tasks like brake light replacement can make a big difference in your safety on the road.
Always consult your vehicle’s manual for specific instructions and safety precautions, as different car models may have slight variations in the process. With a little patience, some basic tools, and the knowledge you’ve gained here, you’ll be tackling more DIY car maintenance tasks in no time!
So, next time you find yourself with a brake light out, don’t panic. Just grab your tools, put on your gloves, and embark on this simple but rewarding journey of brake light replacement.